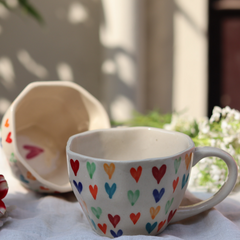
Candle making is the art and process of creating candles by melting wax, adding colors, fragrances, or other decorative elements, and shaping or pouring the wax into molds or containers. It is both a practical craft and a creative hobby that allows for the creation of candles tailored to specific preferences in size, scent, and design.
Step-by-Step Process of Candle Making
Here is a detailed guide to making candles at home or professionally:
1. Gather Materials and Tools
Before you start, assemble the following:
- Wax: Choose the type of wax (e.g., paraffin, soy, beeswax, palm, or gel).
-
Wick: Select a wick suitable for your candle size and type.

- Container or Mold: Jars, tins, or molds to shape your candle.
- Fragrance Oils: Optional, for scented candles.
- Color Dyes: Optional, for customizing candle colors.
- Double Boiler or Wax Melter: To melt the wax safely.
- Thermometer: To monitor the wax temperature.
- Wick Holder: To keep the wick centered (e.g., chopsticks or specialized holders).
- Stirring Tool: To mix the wax, dye, and fragrance.
- Glue or Wick Stickers: To secure the wick at the bottom of the container or mold.
2. Prepare Your Work Area
- Cover your workspace with newspaper or a cloth to catch spills.
- Ensure the area is well-ventilated, especially if using fragrance oils.
- Place all materials within easy reach.
3. Melt the Wax
- Place wax pieces or flakes into the top pot of a double boiler.

- Heat the wax gently over boiling water. Do not apply direct heat to avoid burning the wax.
- Stir occasionally to ensure even melting.
- Monitor the temperature with a thermometer. Recommended temperatures:
- Soy wax: 120–180°F (49–82°C)
- Paraffin wax: 130–190°F (54–88°C)
- Beeswax: 145–175°F (63–79°C)
4. Add Color and Fragrance (Optional)
- Once the wax is fully melted:
- Add candle dye to achieve the desired color. Stir until evenly mixed.
- Add fragrance oil (1 ounce per pound of wax is standard). Mix thoroughly.
5. Prepare the Wick and Container/Mold
- Attach the wick to the center of the container or mold using glue or a wick sticker.
- Use a wick holder to keep the wick upright and centered.

6. Pour the Wax
- Allow the wax to cool slightly (around 130–150°F, depending on wax type) before pouring to prevent cracking or air bubbles.
- Slowly pour the melted wax into the container or mold, holding the wick in place.
- Leave a small amount of wax in the pot for a second pour if needed (to fix sinkholes).
7. Cool and Set
- Allow the candle to cool undisturbed at room temperature for several hours or overnight.
- If the wax forms a sinkhole around the wick, reheat the reserved wax and pour it to fill the hole.
8. Trim the Wick
- Once the candle has completely hardened, trim the wick to about 1/4 inch (6 mm) to ensure a clean and safe burn.

9. Add Finishing Touches
- Decorate the candle if desired (e.g., labels, ribbons, or embellishments).
- Store or package the candle for personal use, gifts, or sale.

10. Test Burn
- Light the candle to test its performance. Check for:
- Even burning
- Proper fragrance throw (for scented candles)
- Adequate wick size (no excessive smoke or tunneling)
Candle making is a rewarding craft that allows for endless creativity, from customizing scents and colors to experimenting with unique shapes and designs.


